
It’s what I dreamed about!

IMG_1026

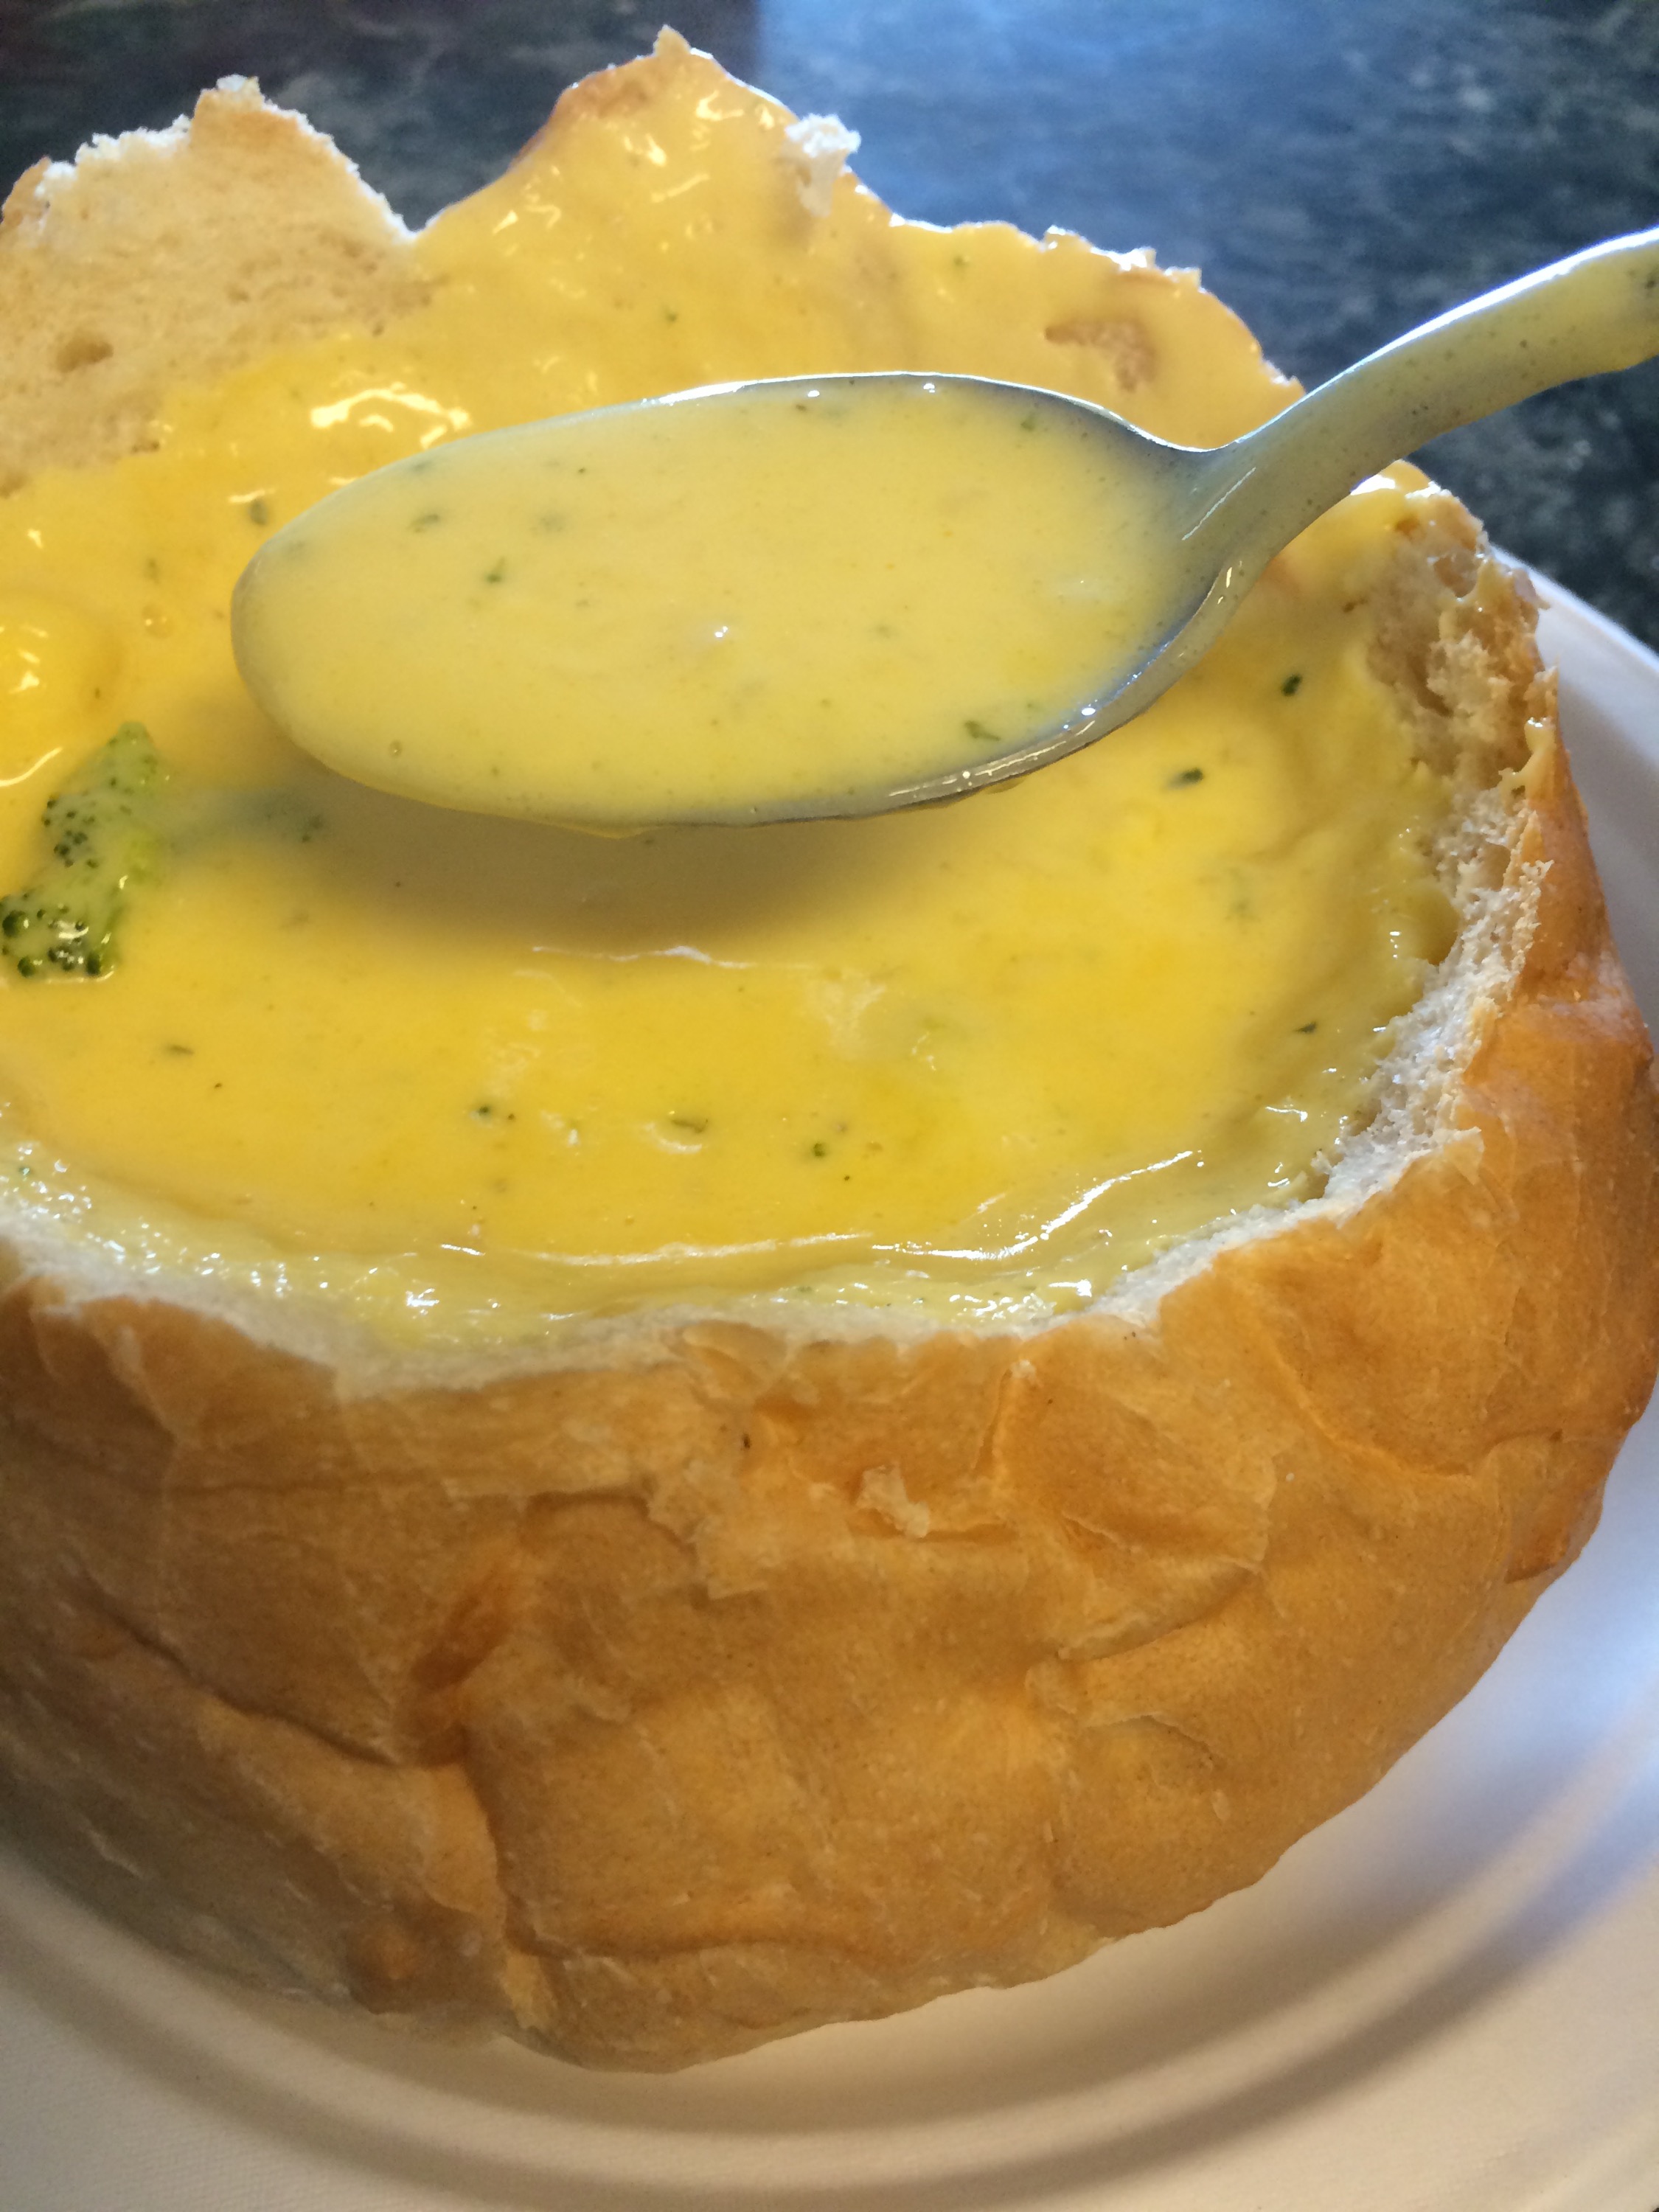
I woke up the other day with a craving for this soup inside a delicious bread bowl. Luckily for me the local grocery store carries fresh made bread bowls, and I found a recipe for the soup.  Within minutes, yes minutes I had mouth watering soup steaming inside a delicious bread bowl.

My picky eater son would not touch the soup. However he would dip the bread into my soup and eat that.  Weird!!

This was perfect on a snowy blowy morning.  I think it will freeze well to be enjoyed many times through the winter.


Broccoli Cheese Soup
  • Servings: 6-8
  • Difficulty: easy
  • Print

IMG_1024


1/2 cup butter

1/2 small onion, finely chopped

1-2 pkgs (16 ounces each) frozen chopped broccoli

7 cups of hot water mixed with Watkins Chicken soup base or 4 cans of chicken broth

1 pound (1 box) of processed cheese, cubed. (I used 1.5 boxes)

1-2 cups heavy cream

1 tbsp garlic powder

1/2 cup cornstarch

1 cup water

salt and pepper to taste


1. Melt butter in a large soup pan. Toss in onions and sauté until tender.  Stir in the broccoli (depending on how much broccoli you want add 1 or 2 bags)  and cover with the chicken broth.  Simmer until the broccoli is tender, about 15 minutes.

2.  Reduce heat, and stir in the cubed cheese. Stir until completely melted. Paying careful attention that it is not sticking to the bottom of the pan.

3.  Add the cream. Stir to combine.  Next mix the cornstarch and the water. Add to the soup mixture.  Stir to incorporate. Stir often until thickened to your liking.  Add the garlic powder, salt, and pepper to taste.

4. Pour into bread bowls.  Enjoy
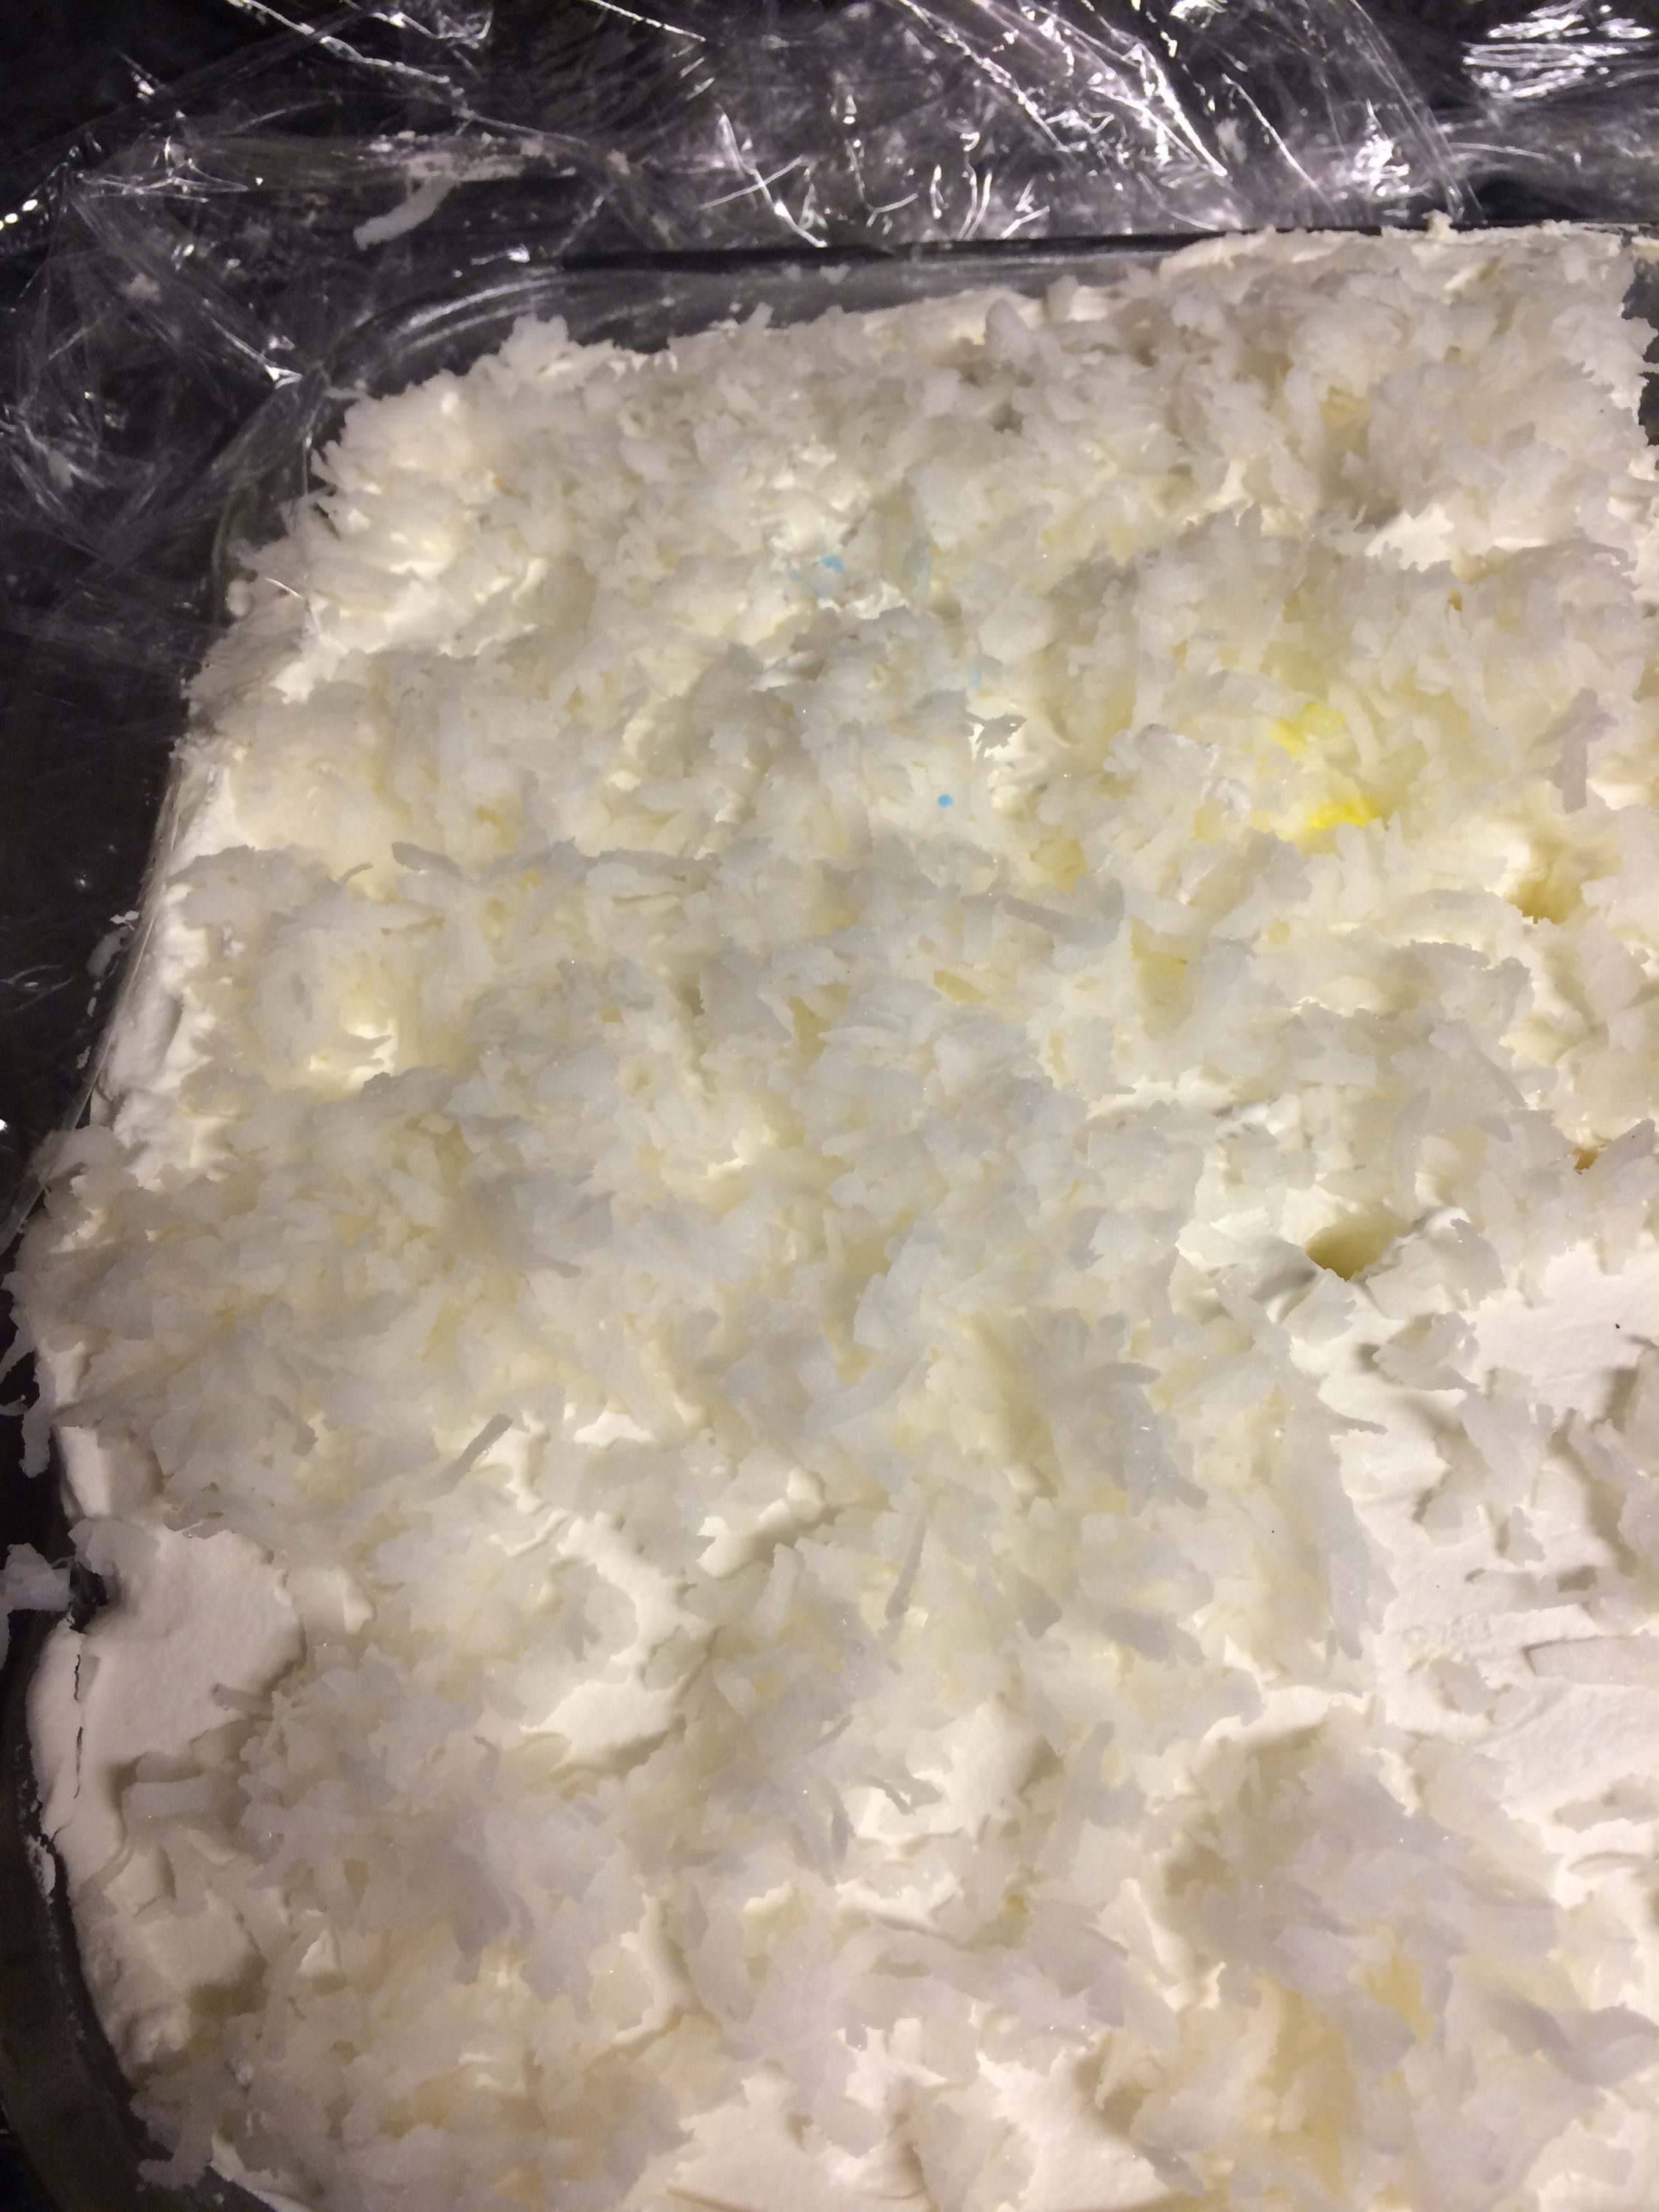


Coconut Heaven

My daughter asked for a coconut cake for her birthday. I was so dreading making the traditional two layer cake topped with mounds of coconut. It is just such a heavy cake.

Although it is delicious and one of my favorites, it is a big cake. To be honest, it just doesn’t get eaten. My family will take a slice maybe two, then that is it. It will lay to rot away.

So I went searching for something new. I found this glorious little cake. It is so rich and wonderful. I waited for it to be nice and cold the next morning. However my family dove in as soon as it was cool enough for me to frost.

It is basically a poke cake, but it is turned up a notch. If you love coconut, this is the cake for you!

Note: You will notice a little yellow spot on the picture of the cake. That is from a dripping birthday candle.

Coconut Dream Cake

1 box white cake mix
1 can sweetened condensed milk
1 can cream of coconut
1 large tub of Cool-whip topping
Sweetened flaked coconut

1. Bake cake in a 9×13 pan according to pkg directions.

2. In a small saucepan combine sweetened condensed milk and the cream of coconut. Don’t boil, just warm throughly and stir until combined.

3. Take cake out of the oven when a toothpick comes out clean. Poke holes over the cake. Pour the coconut mixture over the warm cake slowly. Sprinkle with a little bit of coconut.

4. Let cook completely. Too with cool whip and sprinkle with additional coconut. Place in the fridge to chill.

/home/wpcom/public_html/wp-content/blogs.dir/880/58518633/files/2015/01/img_1011.jpg

The Perfect Anytime Ham!

My Aunt Jo makes the most amazing ham. We have had the privilege of eating her delicacy since we were little. At every major holiday she would make this monster of a ham. When she would arrive with that ham, we would all peak into the kitchen to see if we could get a little bite.  Her ham on my mom’s rolls! Oh it takes my breath away!! The rolls melt in your mouth and then that warm, sweet ham. Oh my goodness, you are truly missing out.

It is amazing. I absolutely love it.  It is wonderful the first day, amazing the 2nd on leftover rolls, and positively decadent in ham and potato soup.  However you decide to use up the few leftovers you will have, you first must make it.  You will not be disappointed.

We happend to be at the grocery store yesterday and picked up a nice spiral sliced ham. I cooked it with Aunt Jo’s recipe today for lunch.  We were not disappointed. It is mouthwatering!!

Christmas Cranberry and Pineapple Ham

IMG_0994

  • 12 lb. ham, uncooked
  • whole cloves
  • 2 ½ cups brown sugar, packed and divided
  • 1 ⅓ cups cranberry juice cocktail
  • ½ cup honey
  • ¼ cup cider vinegar
  • 2 ½ tbsp. all-purpose flour, divided
  • 3 tbsp. prepared mustard
  • 1 can pineapple slices
  • maraschino cherry, halved
1.Remove the skin from the ham; place fat side up. Score fat in a diamond design and stud with cloves. Place ham fat side up on rack in a shallow roasting pan. Insert meat thermometer, making certain end of the thermometer does not touch fat or bone. Bake at 350 degrees for 3.5 – 4 hours
2.Combine 1/2 cup brown sugar, cranberry juice, honey, cider vinegar, flour, and mustard in a saucepan Mix well. Bring to a boil and com one minute. Coat exposed portions of ham with remaining brown sugar. Place pineapple rings on ham securing with toothpicks. Leave tip exposed for cherry halves. Pour hot cranberry sauce over the ham, bake an additional 30 minutes or until thermometer reaches 160 degrees. Let rest before slicing.

Another Morning of Candy Making

I finished up the peanut butter balls. I love peanut butter balls with rice krispies in them.  I just do.  My family not so much.  Which left more than plenty for me to eat.

I will tell you that for the dipping chocolate I used the leftover chocolate from the coconut balls. I made so much that I had more than plenty do handle both the coconut balls and the PB balls and still have to throw out a little.

Enjoy!!

Crunchy Peanut Butter Balls

  • Servings: 20-40 depending on size
  • Print

  • 2 cups creamy peanut butter
  • 1/2 cup butter

  • 4 cups confectioners’ sugar

  • 3 cups crisp rice cereal
  • favorite chocolate dipping recipe
  1. Melt peanut butter and butter in saucepan, over low heat. In large bowl, mix crispy rice cereal and confectioners’ sugar well. Pour melted peanut butter and butter over cereal and sugar and blend together thoroughly.
  2. Put into the fridge overnight.
  3. Scoop with a small cookie scoop and roll into balls. Using a toothpick dip them into your favorite chocolate dipping recipe.
  4. Place in mini muffin wrappers and top with sprinkles to hide the hole the toothpick leaves.
  5. These can be frozen.

IMG_0956.JPG
Peanut Butter Balls These turned out so good. I can’t wait to make them again.

IMG_0955.JPG

Who’s Ready for Coconut Balls?

If you have never eaten one of my Mom’s coconut balls.  Well you have not lived.  Well you may have lived, but you are missing out on one of the best holiday treats ever! i mean ever!! These are one of the best things that could possibly be made during Christmas.

My family will hurt each other over the last or first of these candies. They are that good.  I know that I am late getting this recipe on here, but go ahead and make them now. They freeze amazingly well. Make a batch, freeze them, and then slowly devour them one by one over the next few months. You will thank me. Your hips well they may not thank me, but your tastebuds will relish every single bite!!

Mom's Outstanding Coconut Balls

IMG_0959

  • 1 bag powdered sugar
  • 2 sticks butter, softened
  • 1 can sweetened condensed milk
  • 7 ounces coconut
  • 1 tablespoon vanilla
  • 1 pound chopped pecans
  • 1 ½ large packages chocolate chips-semi sweet
  • 1 block block of parafin-candy wax
1.Melt butter and pour into a mixer. Add 1/2 bag of the sugar. Add milk and rest of the sugar. Add nuts, coconut, and vanilla. Mix well. Refrigerate overnight.
2.In a double broiler melt chocolate chips and wax. Shape nut mixture into balls. Using a fork or toothpick dip into the chocolate mixture and place on waxed papers. Store in the fridge in an airtight container.

Note:

original recipe calls for 2 boxes of powdered sugar. Each box is 3 3/4 cups or 16 oz. Also one block of wax will melt and you will need a lot of chips to make it not so runny. I used one block, but I also used one large bag of semi sweet and 1 large bag of dark chocolate.  Loved the dark chocolate with the coconut.

Also this makes a lot. I mean a lot. When you bring it out of the fridge they will be cold and stiff and roll into nice balls that will not be melted by the warm chocolate. As the mix comes to room temperature it will become harder to dip. I place them back into the fridge and go back later or the next day to finish. I added sprinkles to the tops so that the toothpick hole was hidden.  Much easier than drizzling with chocolate.

IMG_0953.JPG

Amazingly Soft PB Cookies

IMG_0716-1.JPG

I am not a peanut butter cookie fan. However I found this recipe and decided I was going to give it a try. What could it hurt? My family lately loves cookies and I have been trying to keep my cookie jar full. That in itself can be a hard task when cow work seems to be happening daily. The guys love a snack of cookies or brownies when we take a break doing cow work.

Anyway, I found this recipe and I adapted it a little bit to make it fit my needs. It turned out to be a wonderful little cookie. It is a peanut butter dough that you roll in sugar and bake it until they just crack on top. This leaves a very soft cookie on the inside but kind of an outer shell. You must give this recipe a try.

Peanut Butter Cookies

  • Servings: 24-28 small cookies
  • Print

1/2 cup creamy peanut butter
4 tbsp butter, softened
1 cup brown sugar, packed
2 eggs
1 tsp vanilla extract
1 1/4 cups flour
1 tsp baking powder
1/2 tsp salt
Granulated sugar for coating

1. Preheat oven to 350°.

2. Mix peanut butter and butter in a mixing bowl, add brown sugar and beat until well combined. Mix in eggs one at a time, then add the vanilla. Beat until creamy

3. Add the baking powder and salt. Beat until just blended. Then add the flour in small increments. Mix just until combined.

4. Put the granulated sugar in a small ball. Using a small ice cream scoop or cookie scoop, skip out one portion of cookie dough. Role in your hand to make a ball, and then roll it in the granulated sugar. Place on a greased cookie sheet. Place cookies 2 inches apart.

5. Bake for approximately 8 to 10 minutes or just until the edges are browned and the tops begin to crack. DO NOT OVER COOK! Let cool on cookie sheet for a few minutes, then move to a cookie rack.

IMG_0717-0.JPG

Summertime Supper

When summertime finally creeps its way into my world. I try to think of easy and fun things to cook. When the temperatures rise it is very hard to think of cooking a huge meal that not only heats up the house but weighs on your stomach.

I have found that this simple meal is refreshing and light. When the kids head to Tennessee to stay with my parents. I get to take a vacation from the heavy cooking and my husband and I can eat a very light meal. The kids would never touch tomatoes and it works perfect for us. Settle down with this light meal and a glass of wine. Perfect for any summertime evening dreaming of the return of fall and winter!

IMG_00002097

Bruschetta

  • Servings: 3-4
  • Difficulty: Easy
  • Print

1 loaf of french bread, sliced into 6-8 slices 1/2 inch thick

olive oil

2 medium tomatoes

6-8 basil leaves or dehydrated basil

fresh mozzarella

Salt and pepper

  • Chop the tomatoes and basil into small pieces.  Drizzle with olive oil and add salt and pepper to taste. Stir to combine.
  • IMG_00002094
  • Preheat oven to 350 degrees.
  • Slice the french bread about 1/2 inch thick and place on a baking sheet. Drizzle with olive oil. Place spoonfuls of the tomato mixture onto each piece of bread. Top with sliced mozzarella.
  • IMG_00002093
  • Bake until cheese is melted and heated through.
  • IMG_00002096
  • Serve immediately.

Enjoy!

Goulash, Oh Yeah!

Goulash, Oh Yeah!

There is nothing like a bowl of old fashioned goulash on a snowy day.  This past Saturday brought 3 plus inches of snow to our area. It was awesome. Well for me anyways. I was at a conference that whole day and by the time I got home all the work was completed. My hubby ran all the cows in and put the heavies into the shed.  We were ready for winter to show it’s head one more time.

I of course was SOOO excited. I love winter, I love snow, and I love cold weather. But not so much for newborn calves and cows that need to calve.  But it came anyway.

On Sunday we fed the cows and got everyone taken care of.  That night things were pretty cold and I whipped up my husband’s favorite, Goulash.  His grandmother Bobbi made this and it is fabulous. I made it for the first time about 2 years ago. I don’t know why I didn’t want to make it before or why I didn’t even want to taste it, but I didn’t. JJ finally talked me into it and I have loved it ever since. It is slightly sweet and just has the best flavor. To be honest I have actually made tomato soup from scratch just so that I could make Goulash.  Now that is dedication.

When the power went out last October and I had a house full of hunters. I made this soup and it was devoured. It is one of those recipes that everyone enjoys.  I like mine plain. My husband eats it with a slice of bread with jelly. The kids use butter crackers. Anyway you eat it, it is delicious!

Go make it now! You won’t be disapointed.

Grandma Bobbi's Goulash

  • Servings: 8-10
  • Difficulty: Easy
  • Rating: 5 Stars
  • Print

  • 1 onion, chopped
  • 2 lb. ground beef
  • 3 cans tomato soup
  • 2 tablespoons brown sugar
  • 1.5 cups elbow noodles, uncooked
  • 1 can water
1.In a large skillet or saucepan, brown the hamburger with the onion. Drain grease.
2.Add tomato soups and brown sugar. You may need to add 1 can of water if too thick.
3.Add the cooked elbow macaroni and let it simmer until the noodles are tender. Adjust seasonings as needed.
 Enjoy

What’s For Dinner????

What are you cooking? Mom! What’s for Dinner?!!

Those are constant sentences in my house and I am sure the same is heard in homes all around the world.  I have become obsessed with meal planning. Well I am obsessed with anything I can plan and write and create. (Can you tell that since I quit teaching I need a certain amount of time to create plans, calendars, anything!!!)

At the beginning of each month I sit with my dry erase calendar and begin planning my month of meals. It really helps me to cut grocery costs, plan meals, and stop the what’s for dinner questions.  I leave room for leftovers and when I know we will be in town due to activities.

However I am tired of my same old, same old meals.  What I need is your help with something new. So help me out. Here is my calendar help me fill it up. Now be prepared I may ask for your recipe. Also we are ranchers, so meat must be in every meal. LOL

April

  1.  Meatloaf cupcakes (disguised with mashed potatoes for icing)
  2.  Chicken Pot Pies
  3. Hamburgers, deviled eggs, salsa, chips
  4.  Fried Chicken bites, honey mustard, and BBQ dipping sauce
  5.  Salisbury Steaks, mashed potaotes, peas
  6. Chili, cheddar cheese, frito chips
  7. Smoked pork chops – lunch  Spaghetti, garlic bread-Supper
  8.  Chicken Gnocchi Soup
  9. Tacos
  10. Teriyaki Kbobs
  11. Steak, Baked Potatoes, Asparagus
  12. Spinach Salad, deviled eggs are my contributions to Easter Dinner
  13. Chicken Fried Steak, Mashed potatoes, corn
  14. Hamburgers, Baked Beans, Onion Rings
  15. Steaks, garlic mashed potatoes, Green Beans
  16. Pulled pork Sandwiches (from the freezer)

So please help me out. I am open to just about anything. Kid friendly is a must.


Sausage Pinwheels! A breakfast Must

IMG_00001183

I am from the south and one thing that you find everywhere around the holidays is sausage balls. These are made with sausage, cheese, and Bisquick. Then rolled into balls and baked. They can be stored in the fridge and popped in the microwave whenever you need a little snack or a quick breakfast.

My mother always detested these creations. She mentioned more than once that they tasted like flour. I however adore them. Mom changed things to her liking.  I don’t remember when she started making these pinwheels, but they are really delicious. When I make either this recipe or the sausage ball recipe I make a double or triple batch so that I can freeze them. If you have to make a mess it might as well be a big mess!

IMG_00001192

Sausage Pinwheels

  • Servings: 8-10
  • Difficulty: Easy
  • Print

  • 1 tube crescent roll dough
  • 6-8 Swaggerty’s sausage patties
  • 1 Cup shredded cheddar cheese

Unroll the package of crescent rolls. Pinch all seams to create a large rectangle.Place and flatten the sausage onto the dough

.IMG_00001184

Sprinkle the cheese all over the sausage. Beginning at the long side roll it up. Go slowly and pinch any seams that are ripping open as you roll. Pinch the last seam to the roll securing it.

IMG_00001185


Slice it using a serrated knife about 1/2 inch thick. Place on a greased cookie sheet. Bake at 350 degrees until golden brown about 10-15 minutes.